
Minimizing Contamination Risk: Reconstitution to Final Assay
Author: Dr. Numan S. Date: January 1, 2025
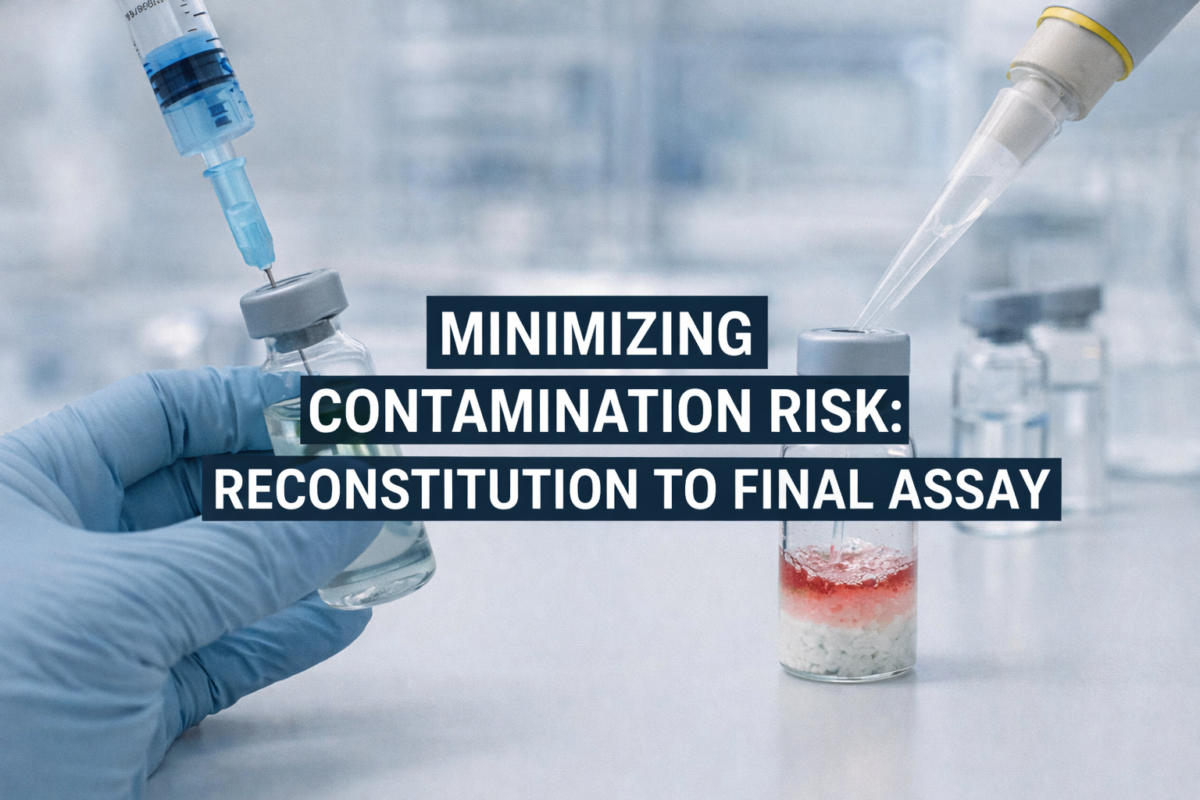
Why Contamination Risk Matters in Peptide Research
Contamination risk is a critical concern in peptide research because even trace contaminants can distort experimental results and undermine assay reliability. For example, endotoxin (bacterial lipopolysaccharide) contamination in a peptide sample can trigger unwanted immune reactions, leading to erratic assay readouts [1]. Contamination of any kind also undermines reproducibility – it becomes difficult for even the same lab to validate findings if microbes or impurities skew the data [2]. Ultimately, contamination can produce false positives or negatives, waste precious reagents, and erode confidence in the results [2]. This is why minimizing contamination risk is essential for obtaining reliable, interpretable outcomes in peptide-based experiments.
Contaminants can be introduced at any stage of peptide handling, from initial reconstitution of a lyophilized peptide to the final assay setup. Common culprits include microbial organisms (bacteria, fungi), endotoxins, cross-contamination from other samples, and chemical residues. Each of these can alter peptide integrity or interfere with detection methods, compromising assay reliability [5]. By understanding where these contamination risks arise and implementing rigorous sterile technique throughout the workflow, researchers can greatly improve the consistency and trustworthiness of their peptide experiments.
Common Sources of Contamination in Laboratory Workflows
Laboratory contamination often stems from a combination of human error, environmental exposure, and inadequate cleaning. Human and procedural risk factors are frequently the biggest source – lapses in aseptic technique such as improper glove use, talking or sneezing near open samples, and pipetting outside of a laminar flow hood all can introduce microbes or particulates [2]. Simple mistakes like using the same pipette tip across multiple samples or not sterilizing equipment between uses lead to cross-contamination. In one analysis, researchers noted that contamination of peptide solutions can come from impure buffer reagents, unclean instruments (e.g. chromatography columns, tubing), or even shedding from laboratory personnel and their protective clothing [3]. These examples highlight how easily contaminants from us and our tools can find their way into peptide samples.
Environmental sources are another major contributor to contamination risk. Airborne dust and aerosols carry microbes that can settle into reagents or open tubes [2]. Laboratories without proper air filtration or airflow control may have high background levels of microbial and particulate matter. For instance, leaving a peptide solution uncapped on the bench in a busy lab exposes it to spores, skin flakes, and other contaminants floating in the air. Likewise, surfaces that aren’t regularly disinfected can harbor bacteria or endotoxin residues. Poor laboratory workflow design – such as failing to separate “clean” areas (for reagent prep) from “dirty” areas (for handling used/biological materials) – allows contaminants to spread freely [2]. Recognizing these common contamination sources is the first step toward mitigating them.
Contamination Risk During Reconstitution
Reconstituting a lyophilized peptide is a vulnerable moment for contamination. The peptide powder must be dissolved in a solvent or buffer, and any microbes or impurities in that solution will directly contaminate the sample. To reduce contamination during reconstitution, always use sterile, high-purity water or buffer recommended for laboratory use [4]. It is best practice to perform the reconstitution in a clean environment, such as under a laminar flow hood, while wearing gloves and other protective equipment. Use sterile glassware or single-use plastic vials for mixing. If the peptide solution will be used in cell-based assays or other sensitive applications, consider passing it through a 0.2 µm filter during preparation to remove any potential bacterial cells [1].
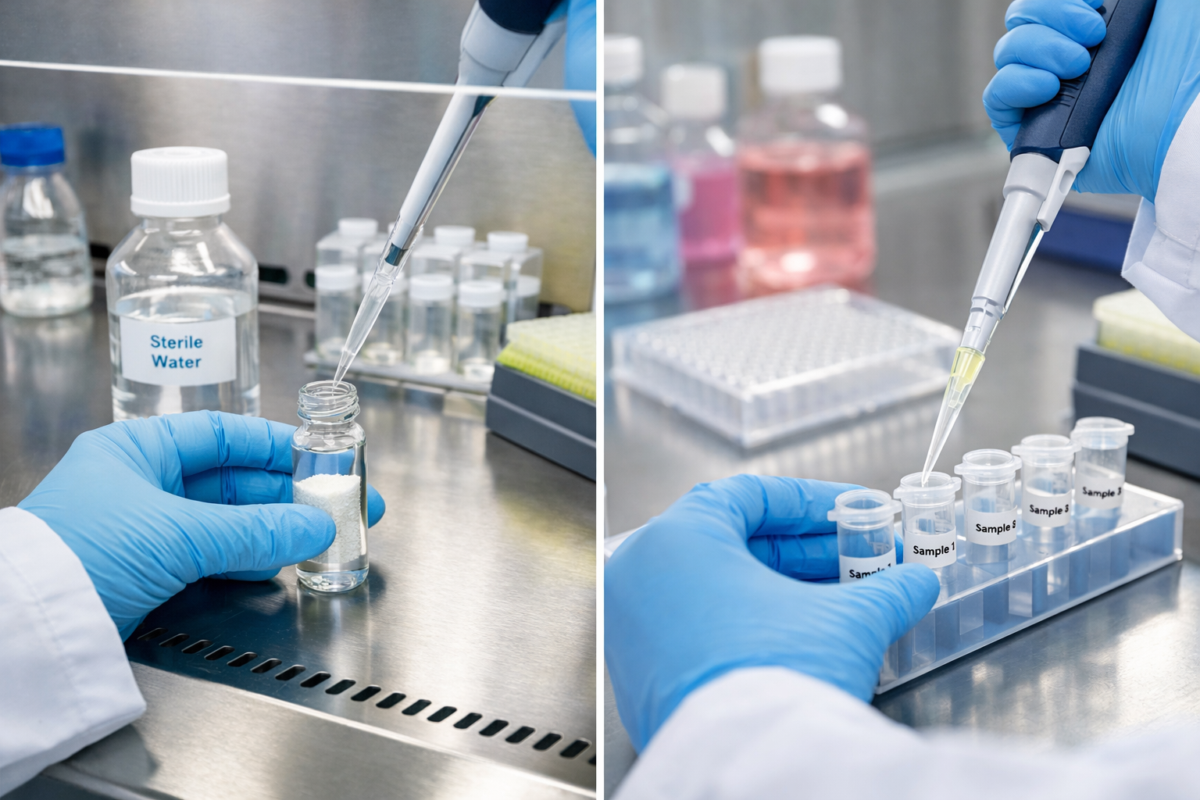
Figure 1: Peptide handling in a controlled lab setting.
This simple sterile filtration step can greatly reduce microbial contamination risk. Additionally, minimize the peptide’s exposure to ambient air – allow the sealed vial to equilibrate to room temperature (preventing condensation), then open it only briefly to add solvent and dissolve the peptide, sealing it again promptly. Careful, sterile technique at reconstitution ensures you start your experiment with a clean sample.
Best Practices for Pipetting and Transfer Steps
Once a peptide is in solution, every transfer or pipetting step carries a contamination risk if not done carefully. Sterile technique is paramount during pipetting. Always use a fresh pipette tip for each sample or aliquot – never reuse tips, as this can carry over material (and microbes) from one tube to the next [6]. In fact, aerosol formation during pipetting is a major hidden contamination source; fast or aggressive pipetting with standard air-displacement pipettes can generate microscopic droplets that contaminate the pipette interior or spread to other vials [6]. To counter this, use filtered pipette tips (which block aerosols) or positive-displacement pipettes when handling peptides for critical assays. Pipette slowly and smoothly to reduce aerosol generation, and keep the tip pointed downwards to avoid liquid contacting the pipette barrel. These practices prevent sample-to-sample contamination and preserve the integrity of each aliquot.
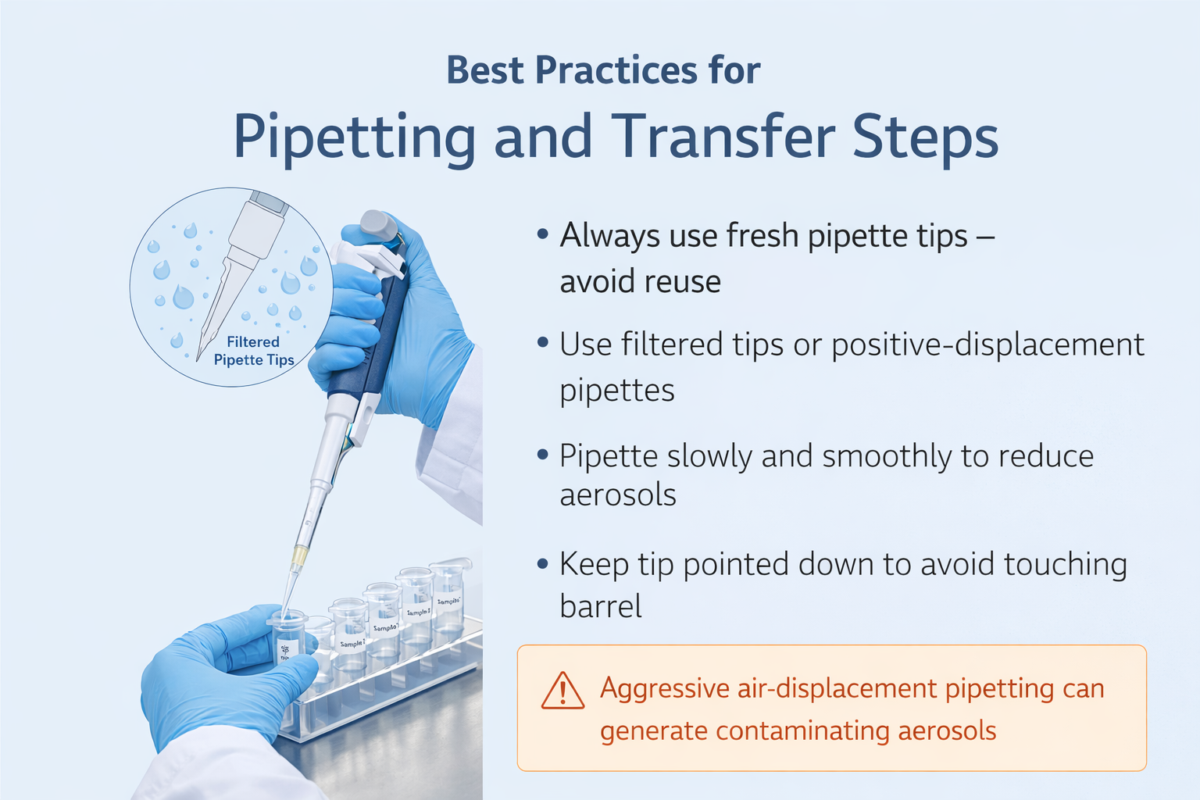
Figure 2: Best practices for pipetting techniques.
When transferring peptide solutions between containers, ensure all labware is scrupulously clean or sterile. For example, if you need to dilute a stock peptide into a buffer, use a sterilized tube for the dilution and a sterilized pipette tip to make the transfer. Even tiny residues left on glassware or in a beaker can introduce contaminants or interfere with sensitive assays [2]. It is wise to rely on single-use sterile plastic consumables (tubes, tips, pipettes) whenever possible, since they come pre-sterilized and eliminate the risk of carryover from previous experiments. If reusable glassware is used, it should be thoroughly cleaned of any detergents or chemicals and then sterilized (e.g. by autoclaving) before use. Also, avoid setting pipette tips or tube lids down on the bench; such contact can pick up microbes. By maintaining good pipetting practices and handling samples only with sterile tools, you greatly lower the contamination risk during routine transfers.
Storage and Stability Factors That Increase Contamination Risk
How you store peptides can significantly affect contamination risk and peptide stability. Freeze–thaw cycles are a well-known hazard – each time a peptide solution is frozen and thawed, there is potential for degradation and for contaminants to be introduced. Repeated freeze–thawing causes peptide molecules to break down or aggregate, possibly generating byproducts that alter the sample’s purity and activity [1]. Moreover, every thaw is an opportunity for environmental microbes to enter when the container is opened. To avoid this, peptides should be aliquoted into small portions immediately after reconstitution so that each aliquot can be thawed and used once (single-use) [1]. By dividing your peptide stock, you don’t have to subject the entire sample to multiple thaw cycles. It’s also important to keep peptide stocks cold. Lyophilized peptides are best stored at –20 °C (or below) in a dry, dark environment [4]The lyophilized form is generally stable for long periods and resistant to microbial growth. If a peptide must be stored in solution, it should be kept at 4 °C or frozen at –20 °C in aliquots, and freeze–thaw cycles should be strictly avoided [4].
Another factor is storage container integrity and exposure to air. Peptide vials should be tightly sealed to prevent moisture ingress, as moisture can not only degrade certain sensitive amino acids but also encourage microbial contamination. Peptides with hygroscopic residues (like Asp, Glu, Lys, Arg, or His) readily absorb water from air and should be stored with desiccant or in a desiccator cabinet [1]. Also, endotoxin risk increases if peptides are stored in non-sterile solutions or handled with non-sterile tools – bacteria can proliferate in a peptide solution over time, releasing endotoxins even if the bacteria die. Using sterile buffers for any long-term peptide storage is therefore critical. Finally, avoid repeatedly opening the primary stock vial; instead, withdraw what you need quickly and reseal the vial, or better yet, prepare multiple sterile aliquots up front. Each additional exposure to the environment is a chance for contamination. By paying attention to storage conditions – temperature, moisture, light, and handling frequency – you can greatly mitigate contamination risks and preserve peptide stability.
Contamination Risk During Dilution and Aliquoting
Diluting peptide stocks to working concentrations and aliquoting into experiment-ready samples are procedures that also require caution. If you are performing serial dilutions, use a fresh sterile tip at each step to prevent “back-contamination” of stock solutions. Even a minute amount of carryover from one dilution step can introduce contaminants upstream. Plan your dilution series in advance so you minimize open handling time. It’s wise to prepare sterile aliquots of peptide on day one: for instance, dissolve the peptide and immediately distribute it into several sterile tubes on ice. This way, each tube can be treated as an independent sample for a final assay, and you avoid repeatedly dipping into a single stock (which would accumulate contamination every time the tube is opened). When aliquoting, work in a clean area (biosafety cabinet if available) and label each tube clearly to avoid mix-ups that could lead to cross-contamination. If the protocol calls for diluting the peptide in culture media or buffer, ensure that diluent is sterile and ideally pre-warmed (cold diluents can cause condensation). Using nuclease-free, endotoxin-tested water or buffers can further reduce contamination risk – many manufacturers certify reagents to be free of common contaminants like DNases, RNases, and endotoxins. By treating the dilution and aliquoting steps with the same level of sterile vigilance as initial reconstitution, you carry forward a contamination-free sample into the final experimental stage.
Consistent Technique Is Key to Minimizing Contamination Risk Across the Full Workflow
Ultimately, minimizing contamination risk requires a workflow-wide mindset. It’s not just one step, but every step from reconstitution to final assay that must be handled with consistent care. This means developing a contamination risk reduction workflow – a standardized sequence of practices that you and your lab mates follow every time. For example, you might start by planning the experiment so that all mixing and aliquoting of peptides happen in one continuous session within a sterile hood, thereby reducing intermittent exposures. Incorporate checkpoints: use fresh gloves at critical junctures, sanitize surfaces before setup, and include blank control samples to detect any contamination that does occur. Emphasize training in proper pipetting and aseptic techniques for all personnel, since the human factor is often the weakest link. Consistency is crucial: even the best protocols only work if applied rigorously across the full workflow for every experiment. The payoff for this discipline is significant – by maintaining contamination-free conditions throughout, you safeguard the accuracy, reproducibility, and credibility of your peptide assays. In summary, a commitment to consistent sterile technique and a well-designed workflow is the most effective way to keep contamination risk to a minimum and ensure reliable results from your peptide research.
Frequently asked questions (FAQs) about Minimizing Contamination Risk
Where does contamination risk most commonly occur in peptide workflows?
- Contamination risk most often arises during open handling steps, particularly reconstitution of lyophilized peptides, pipetting, dilution, and aliquoting. These stages involve direct exposure of the peptide to the laboratory environment, solvents, and consumables. Inadequate aseptic technique, non-sterile reagents, or repeated vial access can introduce microbial contaminants, particulates, or endotoxins that persist through downstream assays.
How can researchers reduce contamination during reconstitution and transfer?
- Risk reduction begins with using sterile, high-purity solvents and performing reconstitution in a controlled environment such as a laminar flow hood. Wearing gloves, minimizing vial open time, and using sterile, single-use pipette tips are essential. Gentle handling that avoids aerosol generation and unnecessary transfers further reduces exposure. For sensitive applications, sterile filtration of the reconstituted solution can provide an additional safeguard against microbial contamination.
What storage practices help prevent contamination exposure?
- Proper storage focuses on limiting repeated handling and environmental exposure. Peptides should be stored in tightly sealed, sterile containers at recommended temperatures, often in aliquoted form to avoid multiple freeze–thaw cycles. Desiccation for lyophilized peptides and protection from light and humidity help preserve stability while reducing opportunities for contamination introduced during repeated access.
How does endotoxin or microbial contamination affect assay outcomes?
- Even low levels of endotoxin or microbial contamination can significantly alter experimental results, particularly in cell-based or immunological assays. Endotoxins may trigger inflammatory signaling pathways, while microbial contaminants can consume nutrients, alter pH, or produce metabolites that interfere with assay readouts. These effects can lead to false-positive results, increased variability, or irreproducible data.
What procedural controls most effectively minimize contamination risk?
- The most effective controls combine environmental management with standardized procedures. These include working within clean or controlled areas, validating the sterility and quality of reagents, implementing clear standard operating procedures for handling and storage, and training personnel in aseptic technique. Routine monitoring and documentation help ensure consistency, allowing researchers to identify and correct potential contamination sources before they impact experimental outcomes.
References
- GenScript. Why Peptide Assays Fail. GenScript Technical Resources. 2019. Accessed 2026 Jan 6. genscript.comgenscript.com.
- MSE Supplies (Marketing Team). How Contamination Happens in Labs (and How to Prevent It). MSE Supplies Blog. Posted Sep 02, 2025. Accessed 2026 Jan 6. msesupplies.commsesupplies.com.
- R&D World (R&D Editors). Controlling Endotoxin Contamination During Peptide Manufacturing. Research & Development World. Nov 1, 2012. Accessed 2026 Jan 6. rdworldonline.com.
- Maxed Out Compounds. How to Handle Research Compounds Safely. MaxedOutCompounds Blog. Sep 5, 2025. Accessed 2026 Jan 6. maxedoutcompounds.commaxedoutcompounds.com.
- Liquilabs. Research Peptide Analysis & Testing – Endotoxin and Microbial Analysis. Liquilabs.cz (laboratory services website). 2026. Accessed 2026 Jan 6. liquilabs.czliquilabs.cz.
- Lab Manager (Sartorius). Preventing Contamination in Pipetting. Lab Manager Magazine. 2021.