
Short answer
A peptide lyophilization protocol freezes a peptide solution solid, removes the ice under vacuum by sublimation (primary drying), then gently warms the product to drive off the remaining bound water (secondary drying). Done carefully, freeze-drying peptides produces a dry, stable powder that is easier to store, ship, and reconstitute.
This guide covers why peptides are lyophilized, what you need, typical cycle settings, and how to store and troubleshoot the result.
Why Lyophilize Peptides? Understanding the Benefits
Peptides are lyophilized because removing water generally slows the chemical reactions that degrade them in solution, which improves peptide stability and storage life. Hydrolysis, deamidation, and oxidation are among the routes that create related impurities in peptides.1
The difference is large in practice. Supplier guidance commonly describes most lyophilized peptides as stable for several years at −20 °C, while the shelf life of peptides in solution is very limited.2 A dry powder is also lighter and more tolerant of shipping, which is why research peptides are commonly supplied lyophilized after peptide synthesis and purification. Freeze-drying itself does not establish sterility. For background, see what a lyophilized peptide is and why lyophilization matters in research.
Materials and Equipment Checklist Before You Begin
Before you start, confirm the freeze-dryer can handle your sample volume and solvent, and have everything for freezing, sealing, and storage within reach.
- A freeze-dryer (lyophilizer) with a working vacuum pump and a condenser rated for your solvent.
- A way to freeze samples: a −80 °C freezer, a dry ice and ethanol bath, or liquid nitrogen.
- Lyophilization vials or tubes, with slotted stoppers if vials will be sealed inside the chamber.
- A volatile, lyophilization-compatible solvent, commonly water with a volatile acid or buffer.
- Low-binding labware, gloves, and labels.
- Dry nitrogen or argon for venting the chamber and purging vials of oxidation-prone peptides.
- Airtight containers and desiccant for storing the dried product.
- A run record sheet and, optionally, a residual moisture test such as Karl Fischer titration.3
Pre-Freeze Preparation: Dissolving and Aliquoting Peptides
Dissolve the peptide completely in a solvent system compatible with the formulation and the freeze-dryer, then divide it into single-use aliquots before freezing. Work promptly, since degradation continues in solution until the sample is frozen.
Solvent choice shapes the dry product. Volatile acids and buffers, such as dilute acetic acid or ammonium bicarbonate, can be reduced during drying, while non-volatile salts stay in the cake. Do not assume all acid or counter-ion residues disappear. Solutions containing DMSO or DMF generally cannot be lyophilized, so avoid them at this stage.4 See choosing solvents for hydrophobic and hydrophilic peptides.
Fill depth matters too. A lower fill depth can shorten primary drying; concentrating the solution helps only if it reduces the fill depth without creating other formulation problems, and fill heights above about 2 cm are generally considered undesirable.5 Keep the fill the same in every vial so the batch dries evenly. Some formulations add a crystalline bulking agent, such as mannitol or glycine, to give the cake structure, or a lyoprotector such as sucrose.5 Aliquoting now also avoids repeated freeze-thaw cycles later.
Freezing Peptides for Lyophilization: Best Practices
Freeze each sample completely solid, well below the formulation’s critical temperature, before applying vacuum. In freeze-drying process design, a final product temperature of about −40 °C is recommended in most cases.5
| Freezing method | Speed | Notes |
|---|---|---|
| −80 °C freezer | Moderate | Simple and consistent; allow time for samples to freeze through |
| Dry ice and ethanol bath | Fast | Practical for small tubes; keep caps and labels above the bath |
| Liquid nitrogen | Very fast | Often gives small ice crystals; use cryogenic protection |
| −20 °C freezer | Slow | May not bring every formulation below its critical temperature |
Freezing rate is a trade-off. Larger ice crystals generally shorten primary drying but leave less surface area, which can lengthen secondary drying, and smaller crystals do the opposite.5 Snap freezing in a dry ice bath or liquid nitrogen is common at lab scale because it is fast and repeatable; whichever method you choose, use it every run.
Hold samples at the final temperature before drying. Published guidance suggests about one hour for fill depths up to 1 cm and about two hours for 1 to 2 cm.5, 6 Applying vacuum to a sample that is not fully frozen can cause boiling, foaming, or loss of material.
The Lyophilization Process: Step-by-Step
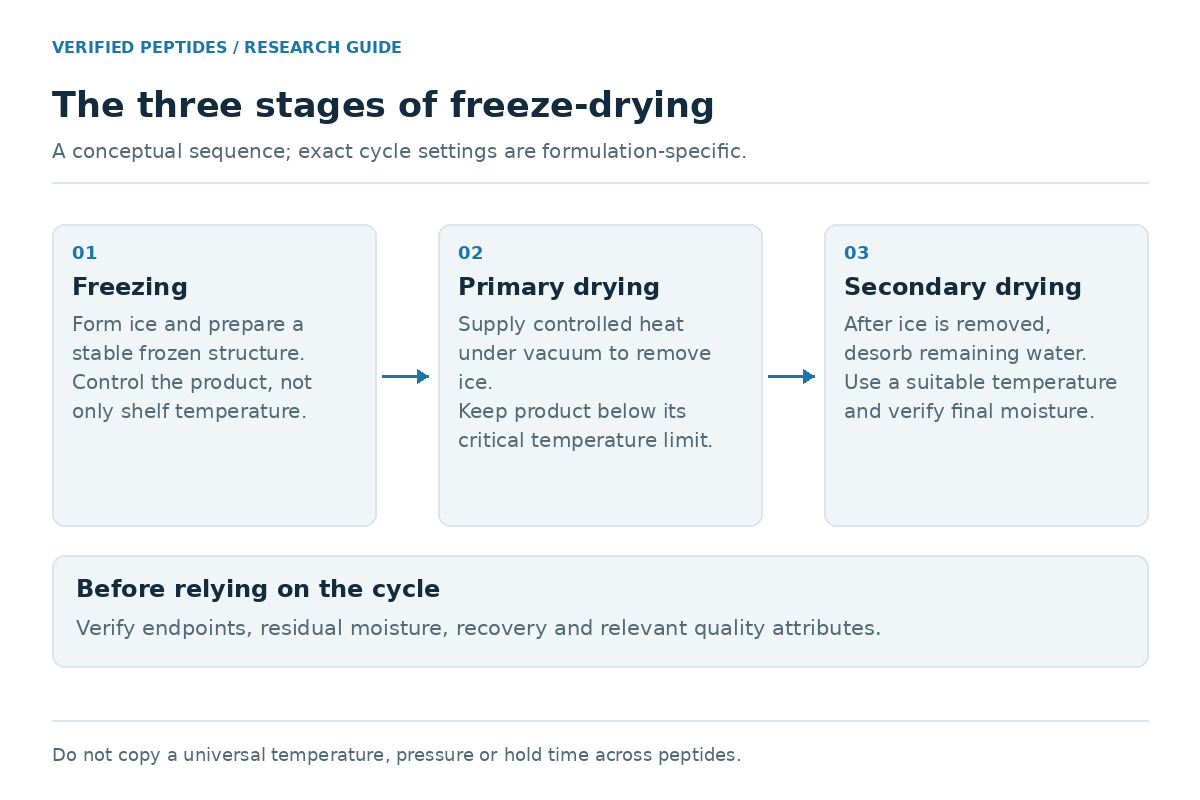
The lyophilization process runs in three stages, freezing, primary drying, and secondary drying, with primary drying (ice sublimation) usually the longest.5
- 1Freeze Freeze samples solid, hold them at the final temperature, then load them into the chamber or onto the manifold.
- 2Pull vacuum With the condenser already cold, lower chamber pressure so ice sublimes directly to vapor and collects on the condenser.
- 3Primary drying Keep the product several degrees below its collapse temperature while the ice sublimes.5
- 4Secondary drying After ice removal is complete, raise the shelf temperature gradually within the peptide’s stability limits to desorb remaining unfrozen water.5
- 5Vent and seal Release vacuum, preferably with dry nitrogen or argon, then stopper or cap vials promptly to keep out moisture and oxygen.7
| Stage | Typical starting point | Why it matters |
|---|---|---|
| Freezing | Product near −40 °C, held about 1 to 2 hours depending on fill depth5 | Ensures the sample is completely solid |
| Primary drying pressure | 50 to 200 mTorr is common in published pharmaceutical cycle-design guidance5 | Supports steady sublimation |
| Primary drying temperature | Product kept several degrees below its collapse temperature5 | Prevents cake collapse |
| Secondary drying | For typical amorphous formulations, published examples use 40 to 50 °C for 3 to 6 hours; use only if the peptide tolerates it5 | Removes bound water |
| Endpoint | Formulation-specific moisture target; below 0.5% is achievable in some optimized amorphous systems5 | Moisture reduces long-term stability4 |
These are examples for cycle development, not a ready-to-run recipe or universal peptide specifications. Confirm that primary drying has finished before raising the temperature for secondary drying. The right settings depend on the formulation, fill, and equipment, and heat-sensitive peptides are commonly dried more gently. The product also stays colder than the shelf during sublimation, and vials at the edge of the shelf tend to dry faster and run warmer, so check them first for signs of collapse.5
Lyophilized Peptide Storage and Handling Tips
Store lyophilized peptides sealed, dry, cold, and away from light. The times below summarize supplier guidance; they are not established expiry dates for every peptide or VP batch. For long-term peptide storage, supplier guidance consistently points to −20 °C or colder.2, 4
| Condition | Typical guidance |
|---|---|
| Room temperature | Days to weeks, or up to about a month, depending on the guide4, 7 |
| Refrigerated (about 4 °C) | Some supplier guidance allows up to a year; follow the specific product’s documented stability7 |
| −20 °C or colder | Long-term storage; supplier guidance describes several years for many peptides, subject to product-specific stability2 |
| Opening a vial | Warm it to room temperature first, then reseal promptly2, 7 |
Warming matters because lyophilized peptides are often hygroscopic, and moisture condenses on a cold powder.7 Peptides containing Asp, Glu, Lys, Arg, or His tend to absorb moisture and are usually kept in a desiccator. Peptides containing Cys, Met, or Trp are prone to oxidation, so limit air exposure and consider purging vials with nitrogen or argon.2, 7
For reconstitution of peptides, match the solvent to the sequence: dilute acetic acid for basic peptides (guides suggest roughly 10 to 30%), dilute ammonium hydroxide or ammonium bicarbonate for acidic peptides (avoid ammonium hydroxide when disulfide bonds are present), and a small amount of DMSO, diluted slowly, for very hydrophobic peptides.4, 7 Test a small amount first; see how to reconstitute lyophilized peptides and temperature, humidity, and light in peptide storage.
Common Issues During Peptide Freeze-Drying and How to Fix Them
Most problems trace back to incomplete freezing, drying too warm, leftover moisture, or air exposure. A small test run can reveal problems before committing more material, but a full load may heat and dry differently.
| Problem | Likely cause | Fix |
|---|---|---|
| Collapsed or shrunken cake | Product exceeded its collapse temperature during primary drying5 | Lower the shelf temperature; consider a bulking agent |
| Melt-back, bubbling, or foaming | Sample was not fully frozen when vacuum was applied | Freeze completely and hold before drying |
| Sticky, glassy, or clumping powder | Residual moisture or formulation-dependent cake properties | Measure moisture first; adjust drying time or temperature within the peptide’s stability limits3 |
| Powder lost or stuck to vial walls | Overfilled vials, abrupt pressure changes, or static | Fill less, change pressure gradually, and use anti-static tools when weighing |
| Poor reconstitution | Non-volatile additives, aggregation, or the wrong solvent | Match the solvent to the peptide’s charge; see solubility troubleshooting |
| Oxidized product | Air exposure of Cys, Met, or Trp peptides2 | Vent with inert gas, limit air in the vial, and store cold |
| Cracked vials | Fast cooling, notably with mannitol formulations5 | Use a moderate cooling rate and suitable vials |
If a peptide behaves differently after drying, compare its HPLC and mass spectrometry data with the pre-drying sample. A mass increase consistent with oxidation, or new impurity peaks, points to a handling step to tighten; see peptide separation by HPLC.
FAQs on Peptide Stability and Reconstitution After Lyophilization
What is the purpose of peptide lyophilization?
To remove water so the peptide is more stable and easier to store, ship, and reconstitute. Supplier guidance describes years of stability at −20 °C for many dried peptides, but the actual shelf life is product-specific and is usually shorter in solution.2
How do you prepare peptides for lyophilization?
Dissolve the peptide fully in a volatile solvent, avoiding DMSO and DMF, divide it into single-use aliquots at an even fill depth, and freeze it completely solid before drying.
Can all peptides be freeze-dried?
Most can, but sequences prone to aggregation or oxidation, and solutions with non-volatile components, need extra care. A bulking agent, inert gas handling, and a small test run usually help.
What are the ideal conditions for lyophilizing peptides?
Generally a fully frozen sample, chamber pressure around 50 to 200 mTorr, a product temperature several degrees below its collapse temperature, and a gradual warm-up for secondary drying.5 Exact settings depend on the formulation and equipment.
How long do lyophilized peptides last?
Supplier guides often describe several years at −20 °C or colder and days to weeks at room temperature. Use the product’s own storage instructions and expiry or retest date rather than treating these ranges as a guarantee.2, 4 Sequence and residual moisture also matter; see our shelf-life guide.
All peptides discussed here are for research use only.
Key takeaways
- Freeze completely, then dry in two stages: primary drying removes ice, secondary drying removes bound water.
- Use volatile solvents, even fill depths, and single-use aliquots.
- Common starting points are 50 to 200 mTorr, with the product kept several degrees below its collapse temperature.
- Store sealed at −20 °C or colder, warm vials before opening, and protect oxidation-prone peptides from air.
Record every run, so a cycle that works once can be repeated exactly.
References
- D’Hondt M, Bracke N, Taevernier L, et al. Related impurities in peptide medicines. Journal of Pharmaceutical and Biomedical Analysis. 2014;101:2-30. PubMed 25044089
- GenScript. Peptide Storage and Handling Guidelines. genscript.com
- Iris Biotech GmbH. How to Decipher a Certificate of Analysis (CoA). June 2025. iris-biotech.de
- Sigma-Aldrich (Merck). Handling and Storage Guidelines for Peptides. Technical guide. sigmaaldrich.com
- Tchessalov S, Maglio V, Kazarin P, Alexeenko A, Bhatnagar B, Sahni E, Shalaev E. Practical advice on scientific design of freeze-drying process: 2023 update. Pharmaceutical Research. 2023;40(10):2433-2455. Publisher full text
- Tang X, Pikal MJ. Design of freeze-drying processes for pharmaceuticals: practical advice. Pharmaceutical Research. 2004;21(2):191-200. doi:10.1023/B:PHAM.0000016234.73023.75
- Alta Bioscience. Peptide Storage and Solubility. altabioscience.com